[XCode]SwiftでTableView動作サンプル
2019年7月4日 2019年7月9日
・動作環境
XCode 10
Swift 5
・手順
- プロジェクトを新規作成する。
- Main.Storyboardにオブジェクトを配置する。
- ViewControllerをコーディングする。
- 起動テストする。
1.プロジェクトを新規作成する。
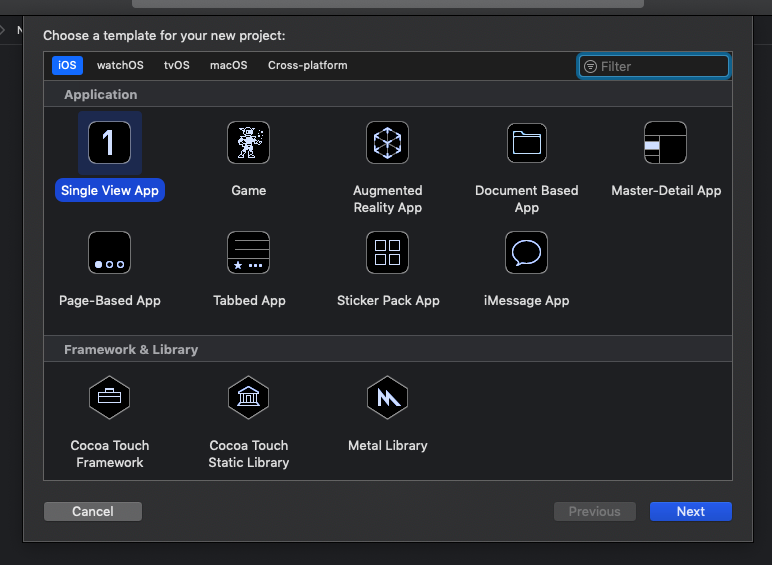
「Command+Shift+N」でプロジェクトを作成する。
テンプレートは「Single View Page」を選択してNext。
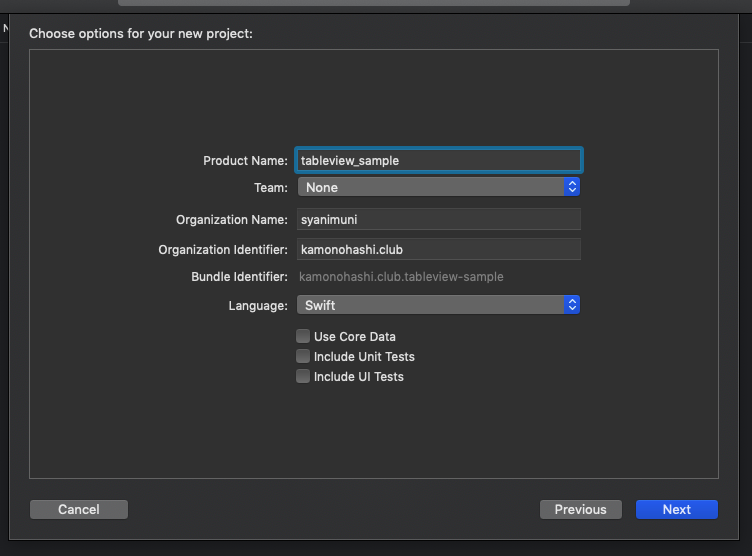
「Product Name」 ... にプロジェクト名を自由に入力する。今回は[sample_tableview]
「Team」 ... 設定済であれば任意で選択、未設定でも可。
「Organization Name」 ... 空白でも可。
「Organization Identifier」 ... 識別情報を入力する。一般的にドメイン名が入力される。
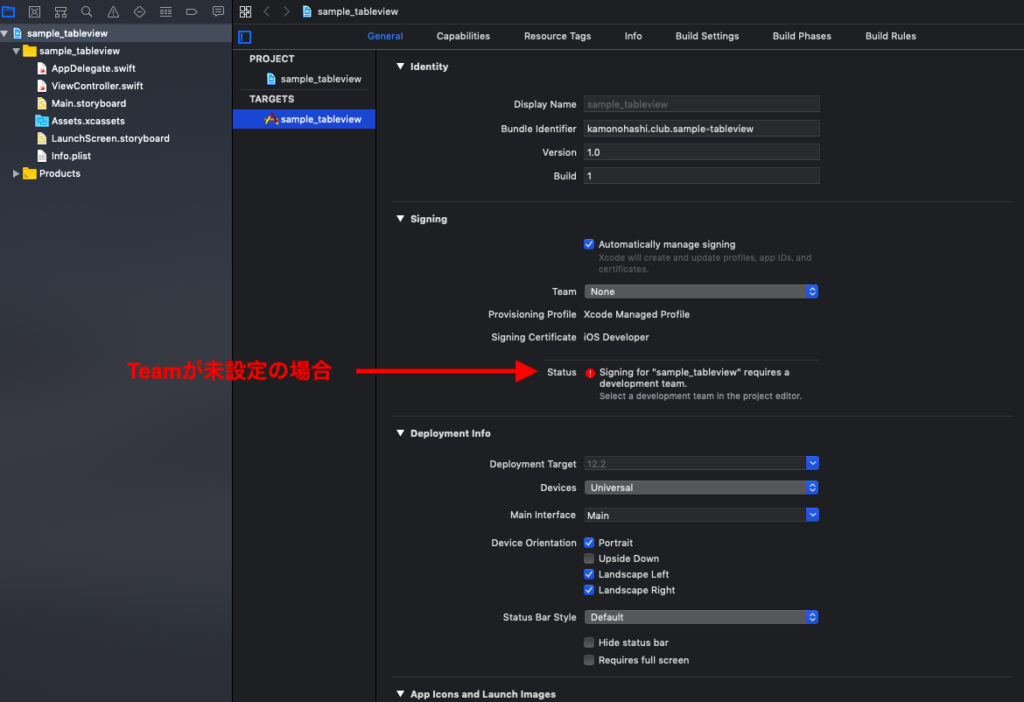
プロジェクトが作成される。この時赤いビックリマークのアイコンはプロジェクト作成時に「Team」を
設定していないためだが今回は気にせずに進める。
2.Main.Storyboardにオブジェクトを配置する。
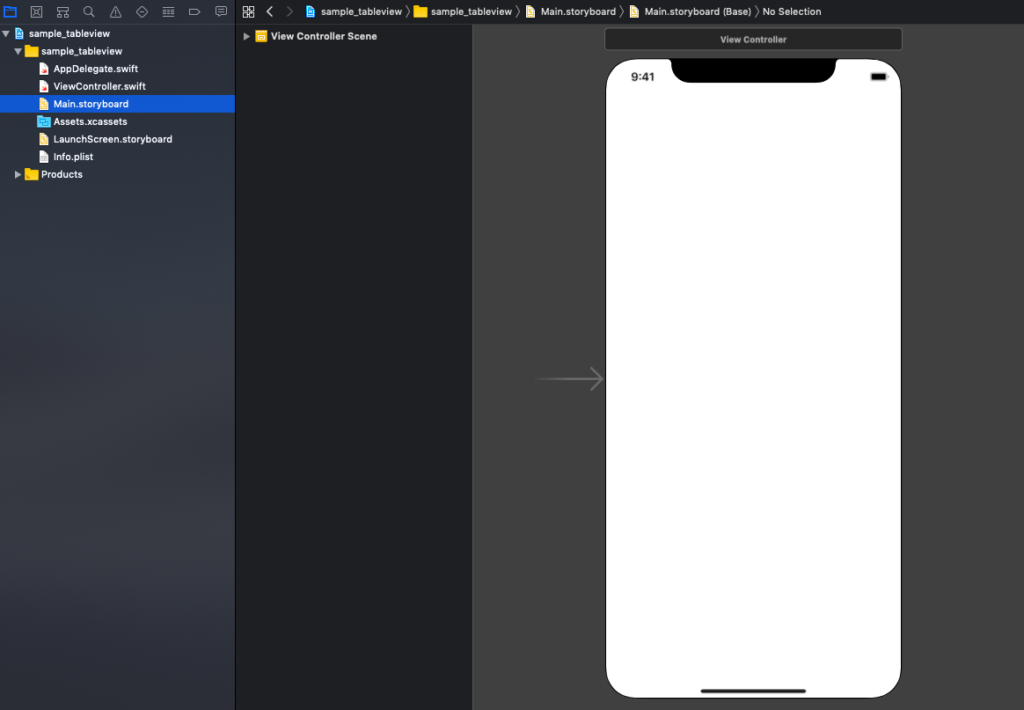
左側のファイル一覧から「Main.Storyboard」をクリックする。
Iphoneのレイアウト画面が表示される。
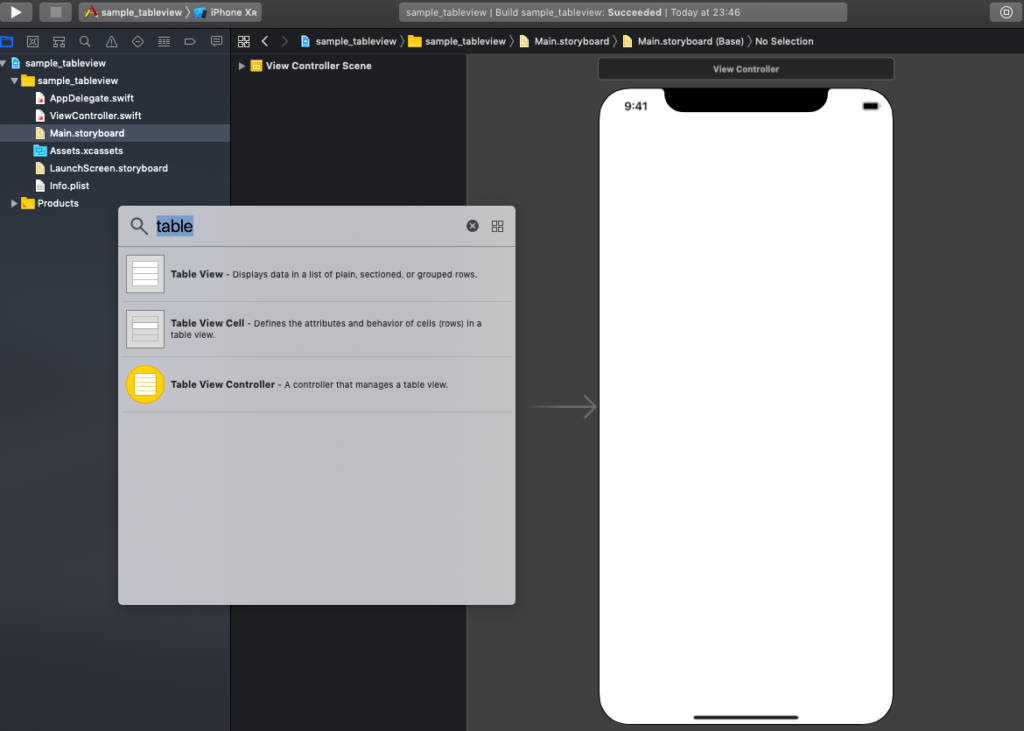
「Command+Shift+L」または画像の①をクリックするとパーツの一覧が表示される。
検索窓から配置したいオブジェクト名を入力すると絞られる。
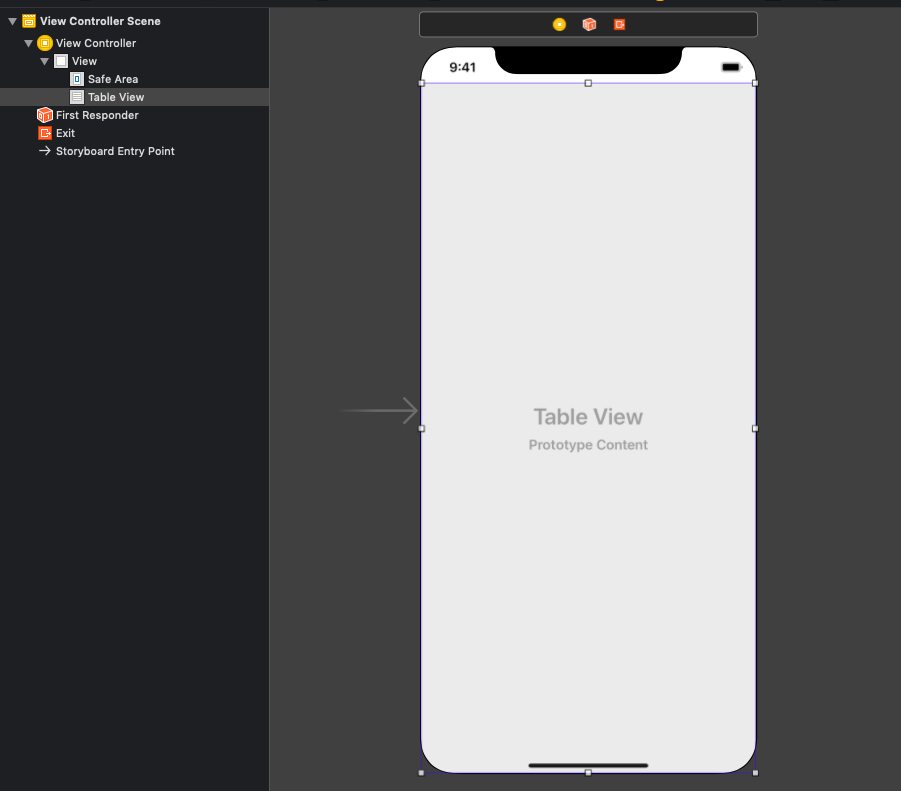
「Table View」をIphoneの画面に向けてドラッグ&ドロップするとオブジェクトが配置される。
配置されたTableViewを画面いっぱいに広げる。
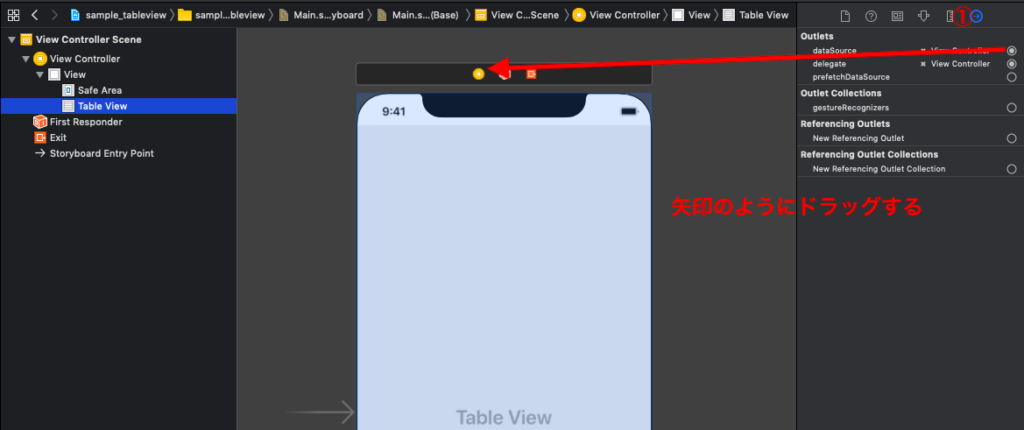
配置したTableViewにOutletを設定する。
TableViewを選択した状態で右側メニューの右矢印のアイコンを選択する。画像①参照
Outletの「dataSource」と「delegate」を画像のようにViewControllerにドラッグ&ドロップで設定する。
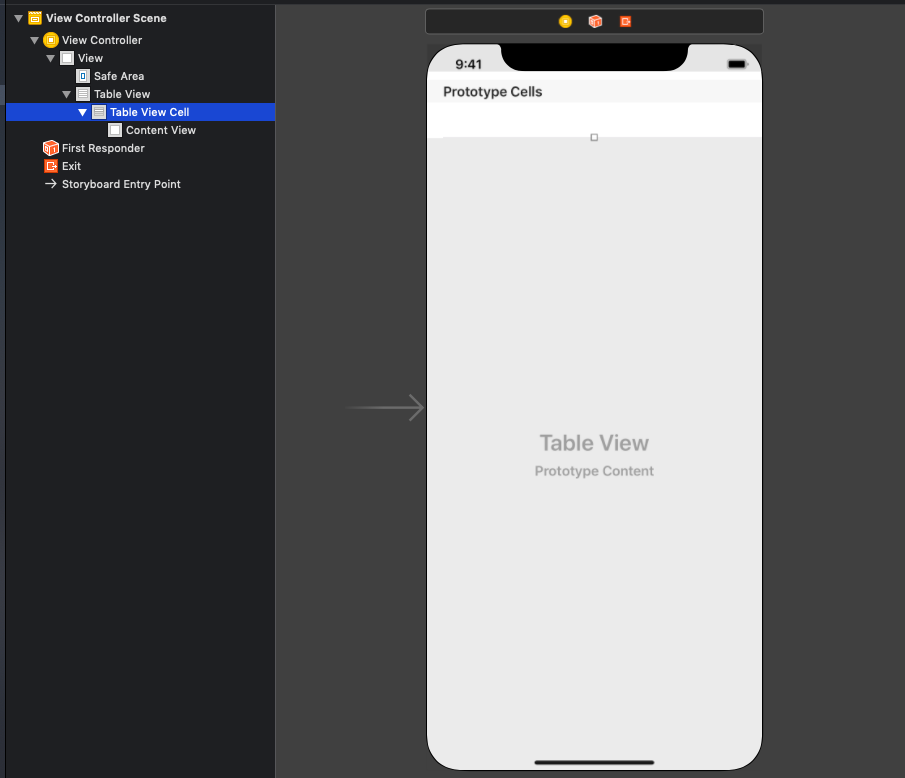
続いてテーブルにセルの値を設定するための「Table View Cell」を追加したTable Viewに向かってドラッグ&ドロップする。
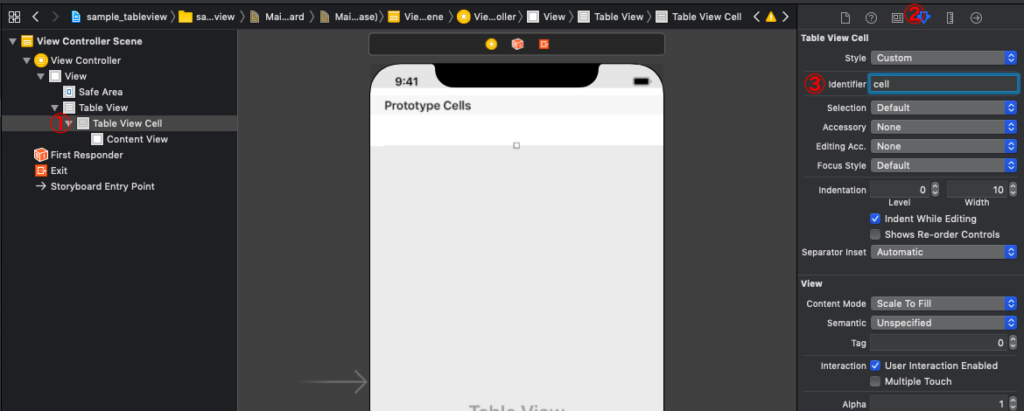
配置したセルに「identifier」を設定する。今回は[cell]と入力している。
入力箇所が出ない、わからない場合は画像の順番にクリックすると一番右に入力フォームが表示される。
3.ViewControllerをコーディングする。
TableViewのOutletで設定したdataSourceとdelegateをソース上で利用する宣言をする。
// 変更前
class ViewController: UIViewController {
}

// 変更後
class ViewController: UIViewController, UITableViewDataSource, UITableViewDelegate {
}
テーブルに表示させたい項目を宣言する。
class ViewController: UIViewController, UITableViewDataSource, UITableViewDelegate {
// テーブルの中身を宣言
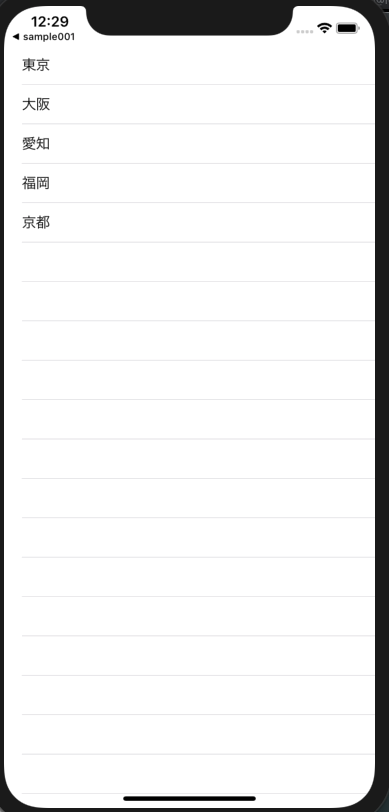
let prefs = ["東京", "大阪", "愛知", "福岡", "京都"]
override func viewDidLoad() {
super.viewDidLoad()
// Do any additional setup after loading the view.
}
}
セルの総数を返すデリゲートメソッドを実装する。これを実装しないとエラーになる。
    // セルの総数を返す
    func tableView(_ tableView: UITableView, numberOfRowsInSection section: Int) -> Int {
        return prefs.count
    }
セルの中身を表示するデータソースメソッドを実装する。これも実装しないとエラーになる。
    // セルの値を設定
    func tableView(_ tableView: UITableView, cellForRowAt indexPath: IndexPath) -> UITableViewCell {
        // Main.storyboardのテーブルセルで設定した識別子を使う(今回は"cell")
        let cell: UITableViewCell = tableView.dequeueReusableCell(withIdentifier: "cell", for: indexPath)
        // セルに表示する値を設定する
        cell.textLabel!.text = prefs[indexPath.row]
        return cell
    }
完成形のソースは下記になる。
import UIKit

class ViewController: UIViewController, UITableViewDataSource, UITableViewDelegate {

    // テーブルの中身を宣言
    let prefs = ["東京", "大阪", "愛知", "福岡", "京都"]

    override func viewDidLoad() {
        super.viewDidLoad()
        // Do any additional setup after loading the view.
    }

    // セルの総数を返す
    func tableView(_ tableView: UITableView, numberOfRowsInSection section: Int) -> Int {
        return prefs.count
    }

    // セルの値を設定
    func tableView(_ tableView: UITableView, cellForRowAt indexPath: IndexPath) -> UITableViewCell {
        // Main.storyboardのテーブルセルで設定した識別子を使う(今回は"cell")
        let cell: UITableViewCell = tableView.dequeueReusableCell(withIdentifier: "cell", for: indexPath)
        // セルに表示する値を設定する
        cell.textLabel!.text = prefs[indexPath.row]
        return cell
    }
}
4.起動テストする。
「Command+B」でビルド後、エラーが出てなければ「Command+R」で実行する。
実行してもアプリが落ちる場合
テーブルセルで設定した識別子が間違っている或いはMain.storyboardでテーブルセルが未設定の可能がないかを確認。
以上で完了です。

- syanimuni
- [Laravel 5.5]ペジネーションの見た目を手早く変更する 2019年8月6日
- [XCode]ワークスペースの各エリアの名称と役割について(2) 2019年7月26日
- DateTimeクラスについて 2019年7月18日
- [PHP]指定日時からn日前、n日後、来年などの日付を計算する 2019年7月17日
- [PHP]別のURLにJSON形式のデータを送信して受信側で処理後のステータスを返す 2019年7月12日